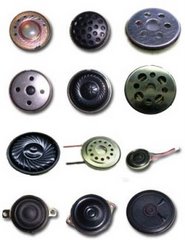
The basic structure of the speaker and the receiver is almost the same; the diaphragm generates the sound by the reaction upon the sound coil and magnet.
The main diversities are as below:
The different usage Depend on the size of the speaker; the distance between the speaker and the user’s ears is normally from several dozens of centimeters to several meters. However we always nestle up a receiver against our ears.
The different material of the diaphragm and the sound coil In order to bear the higher power, the diaphragm of the speaker is usually thicker than the receiver, the thinnest one is 18u. The larger of the dimension and the power is the heavier the diaphragm will be. The receiver takes the lower power, but requests for better low frequency curve; therefore we usually use the diaphragm with the thickness from 6u-12u. Besides the diaphragm, the receiver often works with a piece of paper or cloth to adjust the frequency response, which can help to meet all kinds of standards or to match up the resonant box of the mechanism.
The different electronic characteristic We often see the speaker with impedance of 4-8ohm, the too high impedance leads to the higher power to drive the speaker, normally is from 0.2W to several dozens of watt. Depend on the circuit design, the impedance of the receiver is from 16, 32 to 150ohm. The general power is only from 0.01W to 0.1W.
喇叭(Speaker)與受話器(Receiver)的基本構造是大同小異的,都是透過音圈與磁鐵的作用力,帶動振動膜來發聲,
有幾點較大差異如下:
使用上的不同:
喇叭通常是離使用者的耳機有幾十公分甚至幾十公尺的距離,視喇叭的大小不同而定,
而受話器是緊貼著耳朵來使用的,
膜片,音圈等材質不同:
喇叭需承受較大的功率,故膜片厚度都較厚,從最薄的18u開始,尺寸愈大,功率愈大,膜片就會愈厚重,
受話器的功率小,但要求低頻曲線要好,故一般採用6u-12u的膜片,
除了膜片之外,受話器通常會加貼調音紙或調音布,來調整頻率響應,以符合各種的規範或是來配合機構的共嗚腔.
電氣特性上的不同:
喇叭最常見的為4-8ohm,太高的阻抗會使喇叭需要更高的電壓才能驅動,0.2W到幾十W都有
受話器從16,32,64ohm到150ohm都有,端看客戶的線路設計匹配,一般的功率只有0.01W到0.1W.
2008年1月2日 星期三
Test condition makes the impact on the sensitivity of microphone 測試條件對麥克風靈敏度的影響
Generally speaking, the sensitivity of the microphone will increase when we raise the impedance at 2.2K of RL, the results as the graph 1 & 2.
The sensitivity also rises if we give higher voltage to the microphone, graph 3 & 4.
一般而言,在RL的2.2K阻抗加大,麥克風的靈敏度會變高,結果如圖一二,
V+給麥克風的電壓愈高,麥克風的靈敏度也會變高,如圖三四,
RL 2K =>3K ohm

RL 2.2K => 1.0Kohm
Voltage 2V=>4.5V

Voltage 2V=> 1.2V

Equipment : B&K 2012 + B&K 4227
Microphone : 6.0mm x 2.7mm -42+/-3 dB
The sensitivity also rises if we give higher voltage to the microphone, graph 3 & 4.
一般而言,在RL的2.2K阻抗加大,麥克風的靈敏度會變高,結果如圖一二,
V+給麥克風的電壓愈高,麥克風的靈敏度也會變高,如圖三四,
RL 2K =>3K ohm

RL 2.2K => 1.0Kohm

Voltage 2V=>4.5V

Voltage 2V=> 1.2V

Equipment : B&K 2012 + B&K 4227
Microphone : 6.0mm x 2.7mm -42+/-3 dB
2007年12月2日 星期日
How to choose a buzzer 如何選用蜂鳴器
How to choose a buzzer
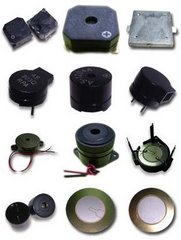
There are many different kinds of buzzer to choose, first we need to know a few parameters, such as voltage, current, drive method, dimension, mounting type, and the most important thing is how much SPL and frequency we want.Operating voltage: Normally, the operating voltage for a magnetic buzzer is from 1.5V to 24V, for a piezo buzzer is from 3V to 220V. However, in order to get enough SPL, we suggest giving at least 9V to drive a piezo buzzer.Consumption current: According to the different voltage, the consumption current of a magnetic buzzer is from dozens to hundreds of mill amperes; oppositely, the piezo type saves much more electricity, only needs a few mill amperes, and consumes three times current when the buzzer start to work.Driving method: Both magnetic and piezo buzzer have self drive type to choose. Because of the internal set drive circuit, the self drive buzzer can emit sound as long as connecting with the direct current. Due to the different work principle, the magnetic buzzer need to be driven by 1/2 square waves, and the piezo buzzer need square waves to get better sound output.Dimension: The dimension of the buzzer affects its SPL and the frequency, the dimension of the magnetic buzzer is from 7 mm to 25 mm; the piezo buzzer is from 12 mm to 50 mm, or even bigger.Connecting way: Dip type, Wire type, SMD type, and screwed type for big piezo buzzer are usually seen.SPL: Buzzer is usually tested the SPL at the distance of 10 cm, if distance double, the SPL will decay about 6 dB; oppositely, the SPL will increase 6 dB when the distance is shortened by one time. The SPL of the magnetic buzzer can reach to around 85 dB/ 10 cm; the piezo buzzer can be designed to emit very loud sound, for example, the common siren, are mostly made of piezo buzzer.
Introduction of magnetic buzzer - Introduction of piezo buzzer
如何選用蜂鳴器
蜂鳴器的種類規格繁多,需先知道幾個參數 ( 電壓,電流,驅動方式,尺寸,連接/固定方式),當然更重要的是,想要獲的聲音 (音壓大小,頻率高低),
工作電壓: 電磁式的蜂鳴器, 從1.5到24V, 壓電式的從3V到220V都是可行的,但一般壓電的還是建議有9V以上的電壓,以獲得較大的聲音.
消耗電流: 電磁式的依電壓的不同,從幾十到上百毫安培都有,壓電式的就省電的多,幾毫安培就可以正常的動作, 且在蜂鳴器啟動時,瞬間需消耗約三倍的電流,
驅動方式: 二種蜂鳴器都有自激式的,只要接上直流電(DC)即可發聲,因為已內建了驅動線路在蜂鳴器中了,因為動作原理的不同,電磁式蜂鳴器要用1/2方波來驅動,壓電的用方波,才能有較好的聲音輸出.
尺寸: 蜂鳴器的尺寸會影響到音量的大小,頻率的高低,電磁式的最小從7mm到最大的25mm,壓電式的從12mm到50mm或更大都有.
連接方式: 一般常見的有插針(DIP), 焊線(Wire), 貼片(SMD), 壓電式大顆的還有鎖螺絲的方式.
音壓: 蜂鳴器常以10cm的距離做為測試的標準,距離增加一倍,大概會衰減6dB, 反之距離縮短一倍則會增加6dB,電磁式蜂鳴器大約能達到85dB / 10cm的水準,壓電式的就可以做的很大聲,常見的警報器,大都是以壓電蜂鳴器製成.
以苙翔的料號, 用量最大的電磁式蜂鳴器AC-1205G為例
A = AATC
C = 一體式,底部有封環氧樹脂的蜂鳴器, 另有AS = 分體式,底部沒封膠,一般頻率為2000左右,不可過錫爐. AX表內含驅動線路(自激式).AD表SMD的.
12 = 直徑,單位是mm, 還有6.7, 9.0, 9.6, 14, 16, 25mm的,並有多種高度選擇
05 = 額定工作電壓, 還有1.5, 3.0, 3.5, 5, 6, 9, 12, 24V.
G = 直流阻抗
壓電式的以AZ-1440S-P為例
A = AATC 苙翔科技
Z = Piezo 壓電式蜂鳴器
14 = 直徑, 10, 12, 14, 16, 17,.....50規格非常多.
40 = 額定的頻率, 40表4KHz,
S = Self drive 自激式,內含線路的, E 表他激, 外部驅動.
P = Pin type, 還有W- Wire, APD-SMD的
2007年11月8日 星期四
Design guide of Microphone Array 麥克風陣列的機構設計
 Microphone Array
 The position of the microphones should be set far away from the source of noise which comes from the product itself, such as fans, keyboards, speakers, or CD-ROM drives, etc. Besides, the microphones are requested to aim at the user, and should be as close to them as possible.
麥克風的位置應遠離產品本身的的噪音源,如風扇,鍵盤,喇叭,光碟機...
並盡可能的對準,接近使用者.
Considering the space of the mechanism design, there are two methods to install the microphones:
1. The stacking typeWhen the microphone array is consisted of an omnidirectional microphone and a unidirectional one, the position of the main sound hole should be set in the middle of the two microphones. Then another secondary sound hole is requested to set for the rear vent of the unidirectional microphone to receive sound.
考慮機構上設計的空間問題,有以下二種裝置方式,
1. 堆疊式
當使用的是一個全指向麥克風配一個單指向麥克風時,主音孔的位置要在二個麥克風的中間,
另需一個副音孔,供單指向麥克風的後氣孔收音用 .
.
1. The stacking typeWhen the microphone array is consisted of an omnidirectional microphone and a unidirectional one, the position of the main sound hole should be set in the middle of the two microphones. Then another secondary sound hole is requested to set for the rear vent of the unidirectional microphone to receive sound.
考慮機構上設計的空間問題,有以下二種裝置方式,
1. 堆疊式
當使用的是一個全指向麥克風配一個單指向麥克風時,主音孔的位置要在二個麥克風的中間,
另需一個副音孔,供單指向麥克風的後氣孔收音用
 .
.2. The side by side type
The two microphones should be set as close to each other as possible, or use one sound hole. Besides, the rear vent of the unidirectional microphone also needs to keep unobstructed in order to receive the sound.
2. 並列式
二個麥克風應盡可能的靠近,或合用一個音孔,單指向麥克風的後氣孔也需保持通暢,能收到音,
The two microphones should be set as close to each other as possible, or use one sound hole. Besides, the rear vent of the unidirectional microphone also needs to keep unobstructed in order to receive the sound.
2. 並列式
二個麥克風應盡可能的靠近,或合用一個音孔,單指向麥克風的後氣孔也需保持通暢,能收到音,
2007年10月11日 星期四
Is the more sensitive microphone the better? 麥克風的靈敏度愈高愈好嗎?
The sensitivity of the microphone is one of the most important factors, which affects the receiving result. The higher the sensitivity is, the higher the SPL can be received.Different from the production process of other products, the microphone is selected and sorted by its sensitivity after producing. We cannot get 1000pcs of what we need in sensitivity from just inputting 1000pcs of microphones’ material on the production line. Therefore, in order to avoid discontinuing the production, we had better choose the spec. usually with the sensitivity of -40 to -44, which is popular and easily produced.About the volume, we can still improve it by modifying the circuit, such as the impedance, the voltage, and the amplification factor.We suggest that do not choose a special spec. with very high or low sensitivity at first, or the problem of lead time and lacking of material might happen.
麥克風的靈敏度是影響到收音效果的重要因素之一,靈敏度愈高,所能收到的音量也說愈大,
但因為麥克風的在生產完之後,再根據實際的靈敏度值加以挑選分類,
並不是投料1000pcs就能做出1000pcs所想要的靈敏度,而會呈現常態的分布,
故最好挑選一般常用,好生產的靈敏度,如-40到-44,在大量使用時,比較不會有斷貨的可能,
而最後的音量問題,仍可藉由線路上的修改,如電阻的大小,電壓大小,放大倍率...來解決,
千萬不要一開始就挑選特別高或特別低的麥克風規格,以免陷入交期交,或缺料的問題中.
麥克風的靈敏度是影響到收音效果的重要因素之一,靈敏度愈高,所能收到的音量也說愈大,
但因為麥克風的在生產完之後,再根據實際的靈敏度值加以挑選分類,
並不是投料1000pcs就能做出1000pcs所想要的靈敏度,而會呈現常態的分布,
故最好挑選一般常用,好生產的靈敏度,如-40到-44,在大量使用時,比較不會有斷貨的可能,
而最後的音量問題,仍可藉由線路上的修改,如電阻的大小,電壓大小,放大倍率...來解決,
千萬不要一開始就挑選特別高或特別低的麥克風規格,以免陷入交期交,或缺料的問題中.
訂閱:
意見 (Atom)